Introduction
Constructing a geologic cross section is a fundamental skill in the field of geology, allowing us to unravel the complex subsurface structures of the Earth. A geologic cross section is a two-dimensional representation that provides insight into the arrangement and relationships between various rock units beneath the surface. In this guide, we will walk you through the step-by-step process of creating a geologic cross section, using the information provided in this article. Whether you’re a geology enthusiast or a student embarking on a geology project, mastering this technique will enhance your understanding of Earth’s geological history.
Step 1: Projecting Contact Lines onto the Topographic Profile
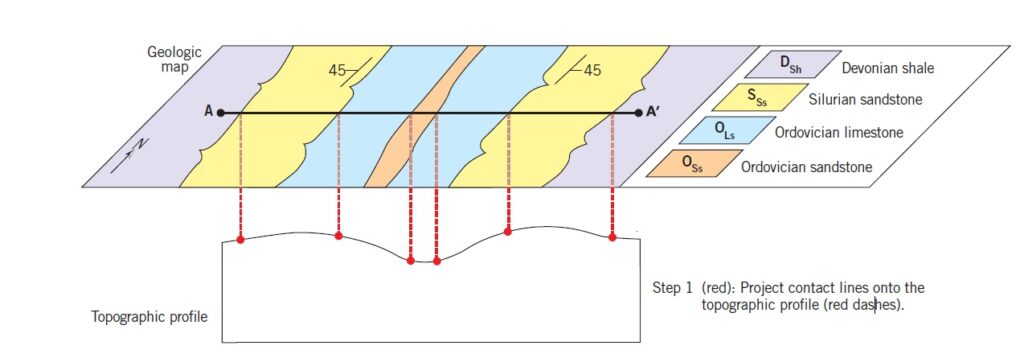
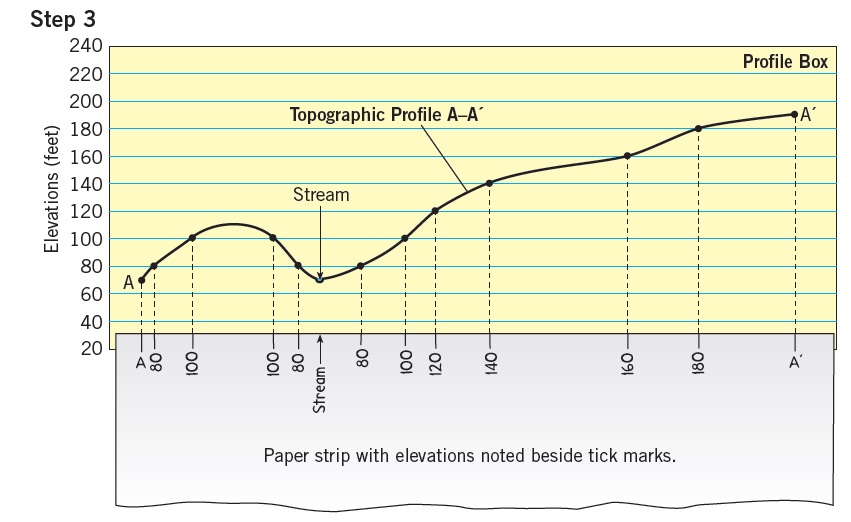
To begin constructing a geologic cross section, you’ll first need a topographic profile that represents the elevation changes along a specific line. In our example, we have a topographic profile with contact lines marked in red dashes. These contact lines represent the boundaries between different rock units. Projecting these contact lines onto the topographic profile provides a visual representation of where these contacts intersect the surface.
Step 2: Projecting Dip Information

In this step, we’ll focus on a sandstone unit that dips 45°E in the eastern portion of our map and 45°W in the western portion. Using a protractor and ruler, project the sandstone contacts from the topographic profile into the subsurface. This projection will help us visualize how the sandstone unit extends beneath the surface. Remember to maintain the appropriate dip direction and angle as you project the contacts.
Step 3: Projecting Other Contacts and Labeling Units

Building upon the previous step, project the remaining contacts into the subsurface parallel to the sandstone contacts projected earlier. This step involves tracing the contact lines from the topographic profile and extending them into the subsurface. As you project these contacts, consider labeling or color-coding the different rock units to differentiate them. Proper labeling enhances the clarity of your geologic cross section.
Step 4: Visualizing the Structure Above Land
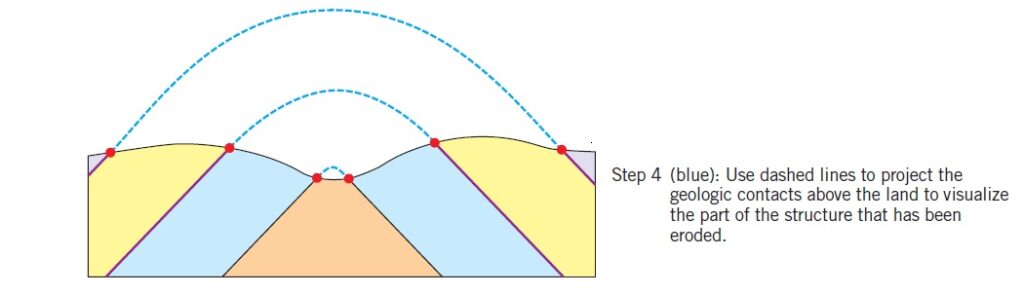
Incorporating dashed lines, extend the geologic contacts above the land surface. This visualization technique provides insight into the exposed rock layers and how they connect to the subsurface structures. By extending the geologic contacts above the surface, you can begin to grasp the overall structural configuration of the region.
Key Considerations for Constructing an Accurate Geologic Cross Section
Accurate Measurements: Precise measurements of dip angles and directions are crucial for constructing a reliable cross section. Ensure you use appropriate tools and techniques to obtain accurate data.
Scale and Proportion: Maintain a consistent scale throughout your cross section. This ensures that the relative sizes and distances between rock units are accurately represented.
Geologic Maps: Geologic maps provide essential information about rock types, ages, and structural features. Incorporate this data into your cross section to enhance its accuracy and realism.
Interpretation: Cross sections involve a degree of interpretation. As you project contacts and visualize subsurface structures, consider geological principles and regional context to make informed interpretations.
Conclusion
Constructing a geologic cross section is a valuable skill that enables geologists to unravel the Earth’s geological history and subsurface structures. By following the step-by-step process outlined in this guide, you can create a detailed and informative representation of the rock units and their relationships beneath the surface. Remember that practice and experience play a significant role in mastering this technique. As you refine your cross-sectional skills, you’ll develop a deeper understanding of the Earth’s dynamic geology.